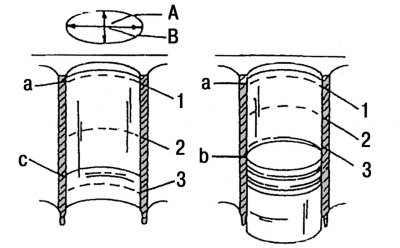
Pic. 55. Places for measuring the holes of cylinder liners: A - measurement in the longitudinal axis of the engine; B - measurement in the transverse axis of the engine; a - the upper stopping point of the upper piston ring; b is the lower stopping point of the piston; c - lower stop point of the oil scraper ring; 1, 2, 3 - measuring points

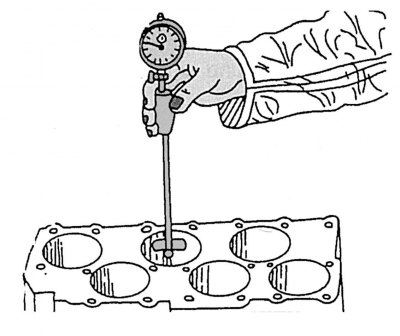
Pic. 56. Measuring cylinder bores with a bore gauge
Cylinder liner bores must be measured in the longitudinal and transverse axes, as shown in the diagram in fig. 55. If these works are carried out on an engine mounted on a vehicle, then the third measuring point will be directly above the piston stopped at BDC. The other two measuring points are correspondingly higher. The inside gauge is lowered into the cylinder sleeve as shown in fig. 56. A total of 6 measurements must be made on each cylinder liner. The results of all measurements must be carefully recorded and then compared with the technical data (see app. 1).
It should be remembered that if dimensional deviations are found on at least one cylinder, all cylinders will need to be bored. A dimensional deviation of 0.20 mm from the nominal, whether in the longitudinal or in the transverse axis, is permissible. If the wear exceeds the allowable limits, then the cylinder liners can be replaced. This work should be carried out only at a specialized service station.

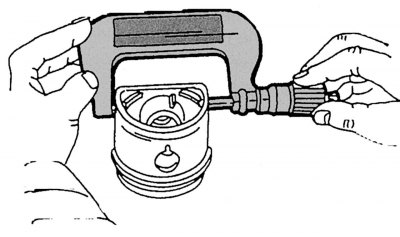
Pic. 57. Measurement of piston diameter
The final size of the cylinder bore is determined by the sum of the piston diameter, measured 10 mm from the bottom edge of the piston skirt, and the piston working clearance, which is between 0.017 and 0.043 mm. On fig. 57 shows the mounting locations of the micrometer. In addition, the cylinder honing allowance must be taken into account, which should be 0.03 mm. The working clearance of the piston should not deviate from the specified one by more than 0.12 mm.
To check the working clearance of the piston, it is necessary to measure the dimensions of the piston and the bore of the cylinder liner, as described above, and determine the difference in the obtained measurement results for each pair of piston-cylinder. If the result exceeds 0.12 mm, then it is necessary to bore the cylinders or install new cylinder liners, since the working clearance has reached the wear limit.
