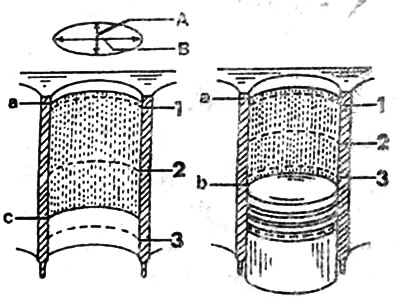
To do this, the cleaned cylinder bores are measured with an internal measuring device in three places - namely in the direction of the axis of the piston pin (direction a), and then perpendicular to it (direction to). With pistons not removed, the third measuring point is just above the bottom dead center of the piston. If the cylinder bores are bored, the honing allowance must not exceed 0.05 mm.

1, 2, 3. Measurement belts. a. piston TDC. b. BDC piston. c. The lower position of the piston skirt.
For V8 engines, a lock-in gauge must be used to measure cylinder bores, as otherwise the cylinder surfaces may be damaged. The cylinder surfaces of 8-cylinder engines are electrolytically processed after boring and honing. With this aluminum so far "assigned", that piston rings and light metal chromed or iron-plated pistons are in contact exclusively with silicide crystals, ranging in size from 0.02 to 0.05 mm, which provide a wear-resistant cylinder surface. These silicide crystals are formed after the electrolysis process. If this operation is not carried out, the result will be a large wear of the pistons. Since this operation can only be carried out in specialized workshops, we will not describe its details here.
