Fix the crankshaft in the centers or install the extreme main journals on the measuring prisms and use the indicator to check the runout of the main journals. The runout should not exceed 0.06 mm. If exceeded, replace the crankshaft.
Measure the clearances in the main and connecting rod bearings:
- Install the main bearing caps without inserts in the cylinder block in accordance with the designations and tighten the nuts to a torque of 100 Nm.
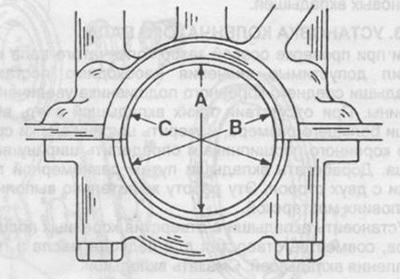
- in accordance with fig. 34 Measure the bore diameter in directions A, B and C of each main bearing and record. With an increase in the diameter or ovality of the hole within 0.02 mm, the defect can be eliminated by grinding on the marking plate using emery cloth.
- unscrew the covers, put the liners on and tighten the nuts again.
- Measure hole diameters and record.
- Subtract from the diameter of the bearing bore the diameter of the corresponding crankshaft journal. The clearance for main bearings should be within 0.035... 0.075 mm, for connecting rod bearings 0.035... 0.065 mm. The clearance limit is 0.09 mm for main bearings and 0.08 mm for connecting rods. If necessary, the gap can be provided by installing new liners.

Pic. 34. Measuring the diameter of the main bearing of the crankshaft.
